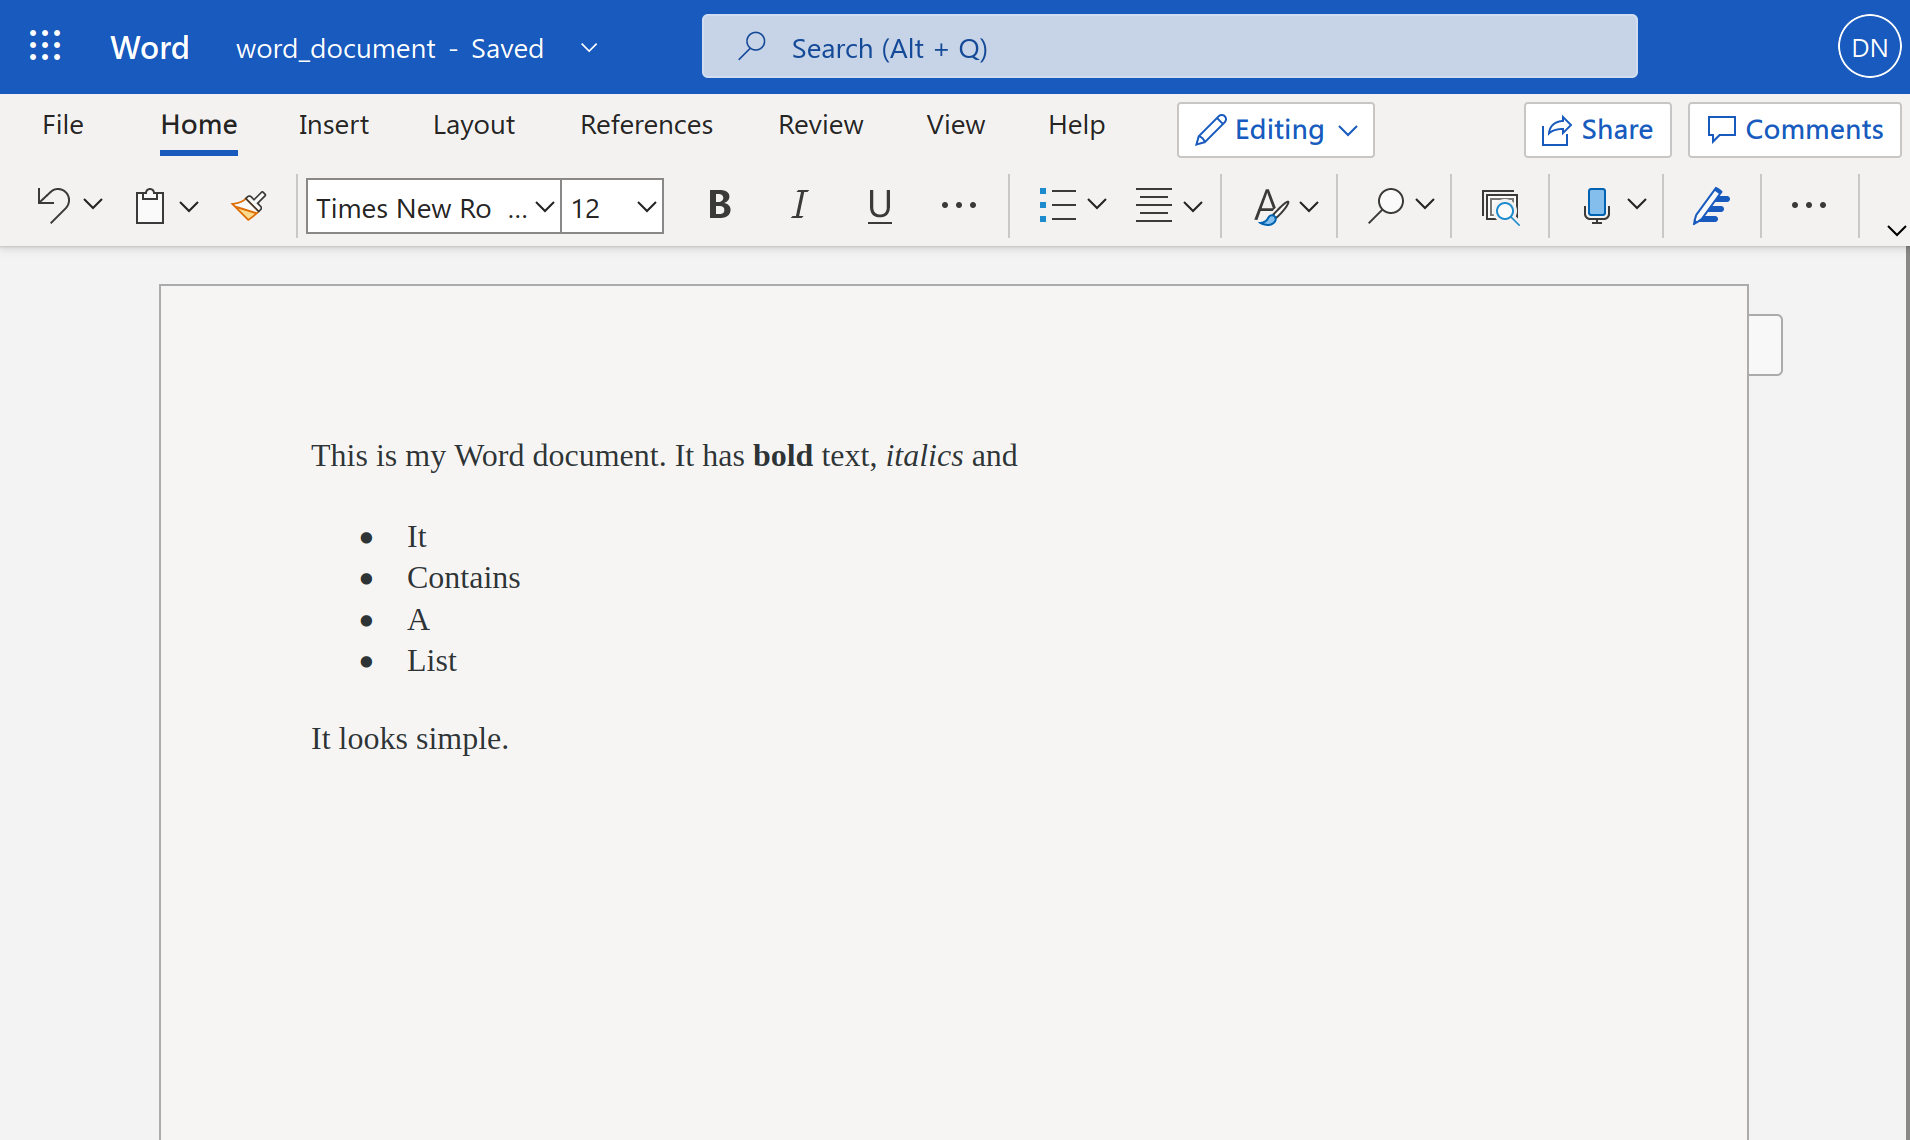
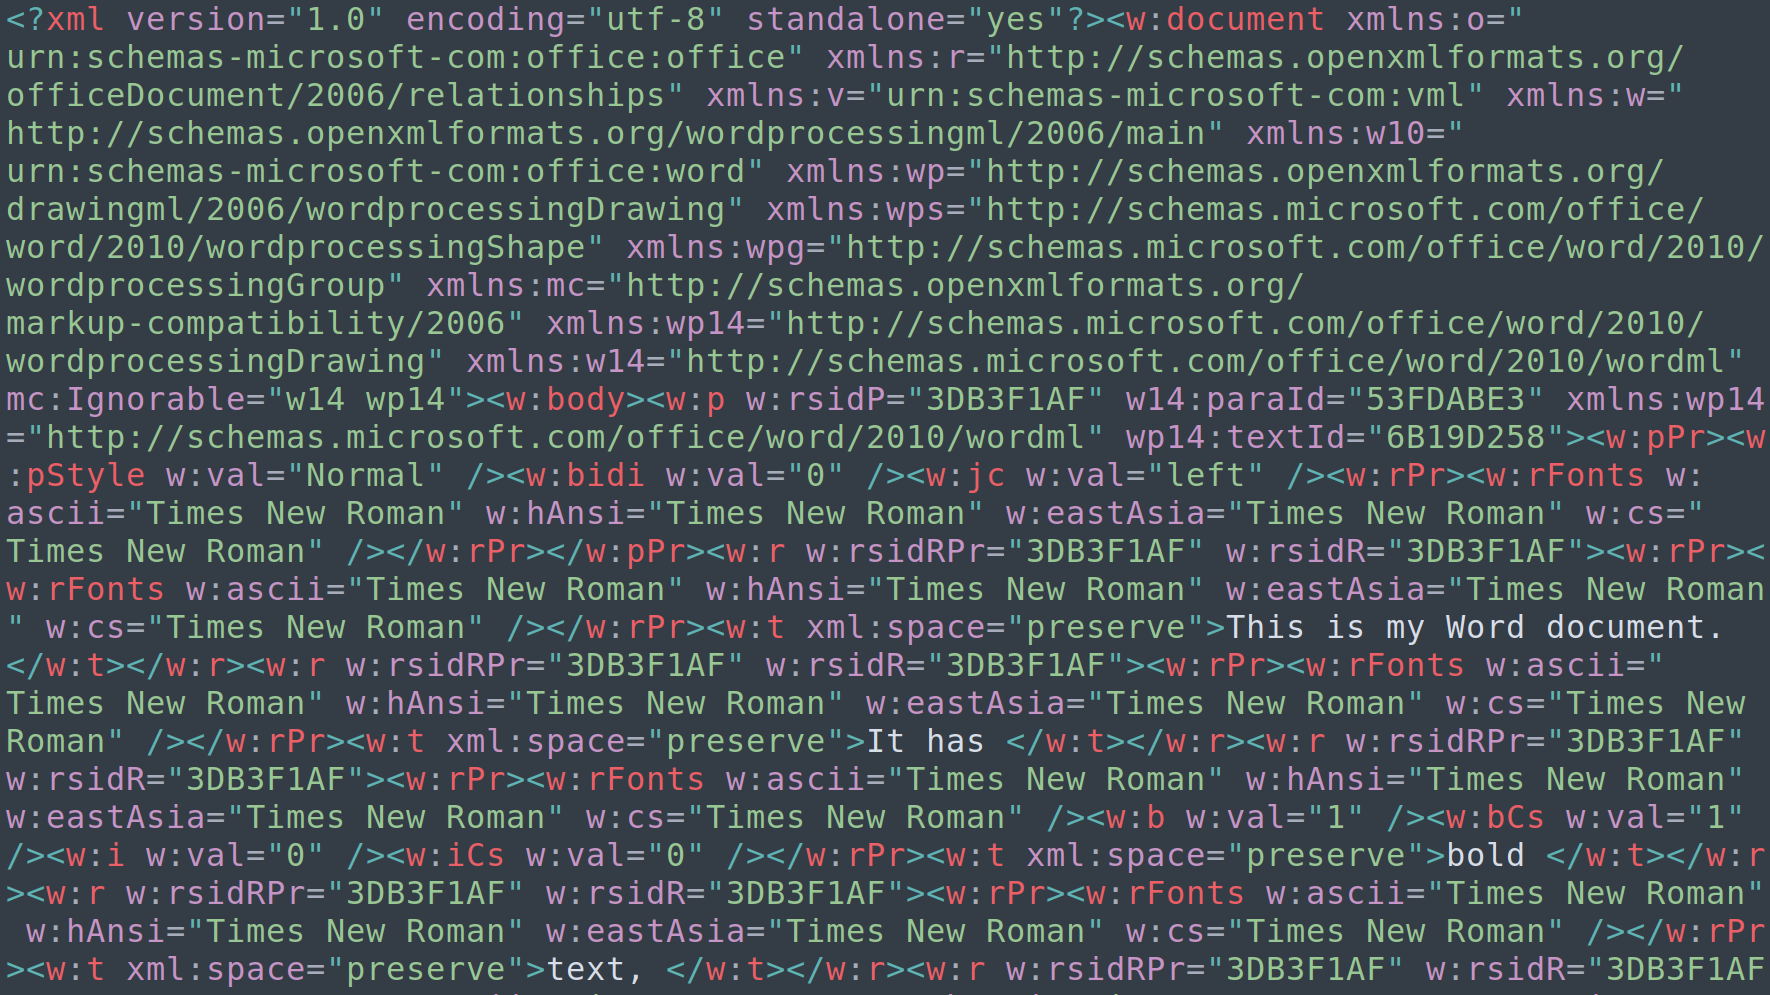
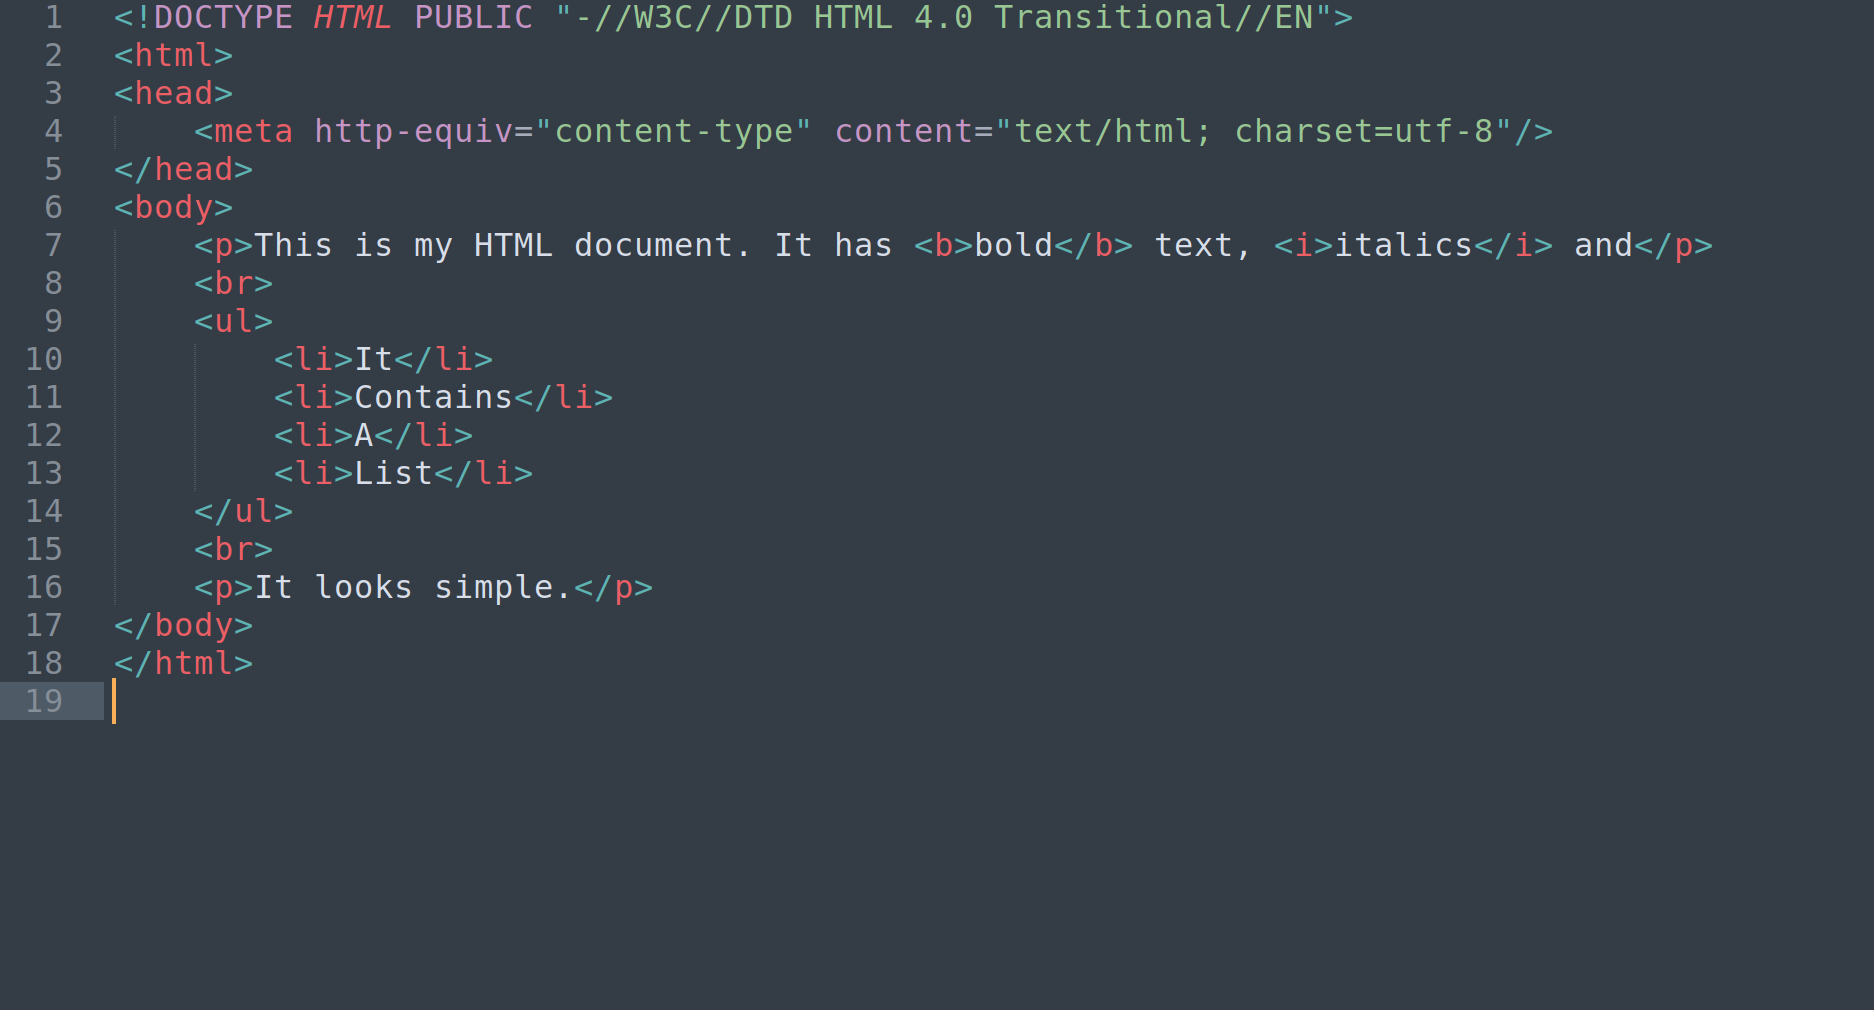
class: center, middle, inverse, title-slide .title[ # PSY 505: Research Issues and Practices in Psychology ] .subtitle[ ## R Markdown and Papaja ] .author[ ### Jason Geller, Ph.D. (he/him/his) ] .date[ ### 2022-09-13 ] --- class: middle ## What are we going to cover? - **Markdown:** a simple text-only format for writing documents - **R markdown:** a tool for mixing R code with markdown - **Papaja:** tool for writing APA style articles --- # Installing R Markdown - First things first ```r install.packages("rmarkdown") if(!requireNamespace("tinytex", quietly = TRUE)) install.packages("tinytex") tinytex::install_tinytex() #this allows us to knit to pdf.You could #download latex but it is a big file. #tinytex works beautifully ``` --- # Installing R Markdown <img src="open_rmd.png" height="70%" /> --- ## R markdown is a "chimera" .pull-left[ <img src="img/chimera.jpg" width="527" /> ] -- .pull-right[ <br> ### On the input side... - Write text in markdown - Insert code using R - Write "metadata" with YAML - Insert equation with LaTeX ] --- ## R markdown is a "chimera" .pull-left[ <img src="img/chimera.jpg" width="527" /> ] .pull-right[ <br> ### On the output side... - Output to HTML - Output to PDF - Output to Word - Many other variations too ] --- lass: middle, inverse .hand[Lots of little things to learn!<br>We'll start with markdown...] --- class: middle, inverse background-image: url("img/silhouette.jpg") background-size: cover .pull-left-narrow[ .huge-bisque-number[1] ] .pull-right-wide[ <br><br><br> .larger[.embolden[Stating the problem...]] ] --- class: middle <!-- --> --- class: middle <!-- --> --- class: middle ## Word documents are complicated - A .docx file is a compressed folder with lots of files - Your text is buried in with a lot of formatting information --- class: middle <img src="img/html_document_surface.png" height="80%" /> --- class: middle <!-- --> --- class: middle ## HTML documents are complicated - Looks simple because I removed most formatting - Still unpleasant to look at --- class: middle, inverse background-image: url("img/silhouette.jpg") background-size: cover .pull-left-narrow[ .huge-bisque-number[2] ] .pull-right-wide[ <br><br><br> .larger[.embolden[Why markdown?]] ] --- class: middle ## What do we want? - Something that... you can write in **plain text** - Something that... is **human readable** - Something that... allows **formatting** - Something that... can **build** to something pretty --- class: middle, inverse .hand[Here's an example of a markdown document...] --- .pull-left-wide[ ``` # Introduction Welcome to my **awesome** class. You will learn all kinds of useful things about R markdown. ## Why should you care? - Markdown is simple and reproducible - You can make it pretty if you want to - The R Markdown variant lets you add R code ``` ] --- class: middle, inverse .hand[Here's what the output looks like...] --- # Introduction Welcome to my **awesome** class. You will learn all kinds of useful things about R markdown. ## Why should you care? - Markdown is simple and reproducible - You can make it pretty if you want to - The R Markdown variant lets you add R code --- class: middle ## Notice the theme! - My slides are written using markdown (...sort of) - So the markdown output you see here matches the slides theme - I'll talk about modifying themes later --- # What does this have to do with open science? Using Markdown to generate publications, reports, websites, etc. will: * Make dynamically updating them with new results easier * Reduce errors from manually entering results * Create new venues for science communication Using Markdown to organize your code will: * Allow you to organize and annotate your analyses * Make it easier for others to tell what you did, aiding reproducibility --- class: middle, inverse .hand[Okaaaay, but this seems really boring?] --- class: middle, inverse .hand[... hm, yeah, but let me show you where it takes you later!] --- class: middle ## Professional websites <img src="img/example_professional_site.png" width="50%" height="70%" /> --- class: middle ## Visual blogs <img src="img/example_visual_blog.png" width="50%" height="70%" /> --- class: middle ## Books <img src="img/example_book.png" width="80%" height="70%" /> --- class: middle ## Academic papers <img src="img/example_papers.png" width="60%" height="70%" /> --- class: middle ## Slide decks <img src="img/example_slides.png" width="80%" height="70%" /> --- class: middle, inverse background-image: url("img/silhouette.jpg") background-size: cover .pull-left-narrow[ .huge-bisque-number[3] ] .pull-right-wide[ <br><br><br> .larger[.embolden[Getting ready]] ] --- class: middle, inverse background-image: url("img/silhouette.jpg") background-size: cover .pull-left-narrow[ .huge-bisque-number[4] ] .pull-right-wide[ <br><br><br> .larger[.embolden[Starting markdown]] ] --- class: middle, inverse .hand[Okay, let's dive into the details...] --- ## Emphasising text -- .pull-left[ ### What you type... <br> ``` this is *italics* this is **bold** this is ***bold italics*** ``` ] -- .pull-right[ ### What you get... <br> this is *italics* this is **bold** this is ***bold italics*** ] --- ## Creating lists -- .pull-left[ ### What you type... <br> ``` - unnumbered lists - look like this 1. numbered lists 2. look like this ``` ] -- .pull-right[ ### What you get... <br> - unnumbered lists - look like this 1. numbered lists 2. look like this ] --- ## Creating headings -- .pull-left[ ### What you type... <br> ``` # Level 1 heading ## Level 2 heading ### Level 3 heading ``` ] -- .pull-right[ ### What you get... <br> # Level 1 heading ## Level 2 heading ### Level 3 heading ] --- class: middle, inverse .hand[Demonstration:<br>Write a markdown document] --- class: middle, inverse .hand[Do it yourself!] - Create your own RMD - Open a new markdown document - Save it as `my_first_markdown.md` - Write some markdown, build it to HTML file - Try to use all these markdown features --- class: middle, inverse background-image: url("img/silhouette.jpg") background-size: cover .pull-left-narrow[ .huge-bisque-number[5] ] .pull-right-wide[ <br><br> .larger[.embolden[More markdown]] ] --- ## Inserting hyperlinks -- .pull-left-wide[ ### What you type... <br> ``` https://placekitten.com [Placekitten](https://placekitten.com) ``` ] -- .pull-right-narrow[ ### What you get... <br> https://placekitten.com [Placekitten](https://placekitten.com) ] --- ## Inserting local images -- .pull-left[ ### What you type... ```  ``` ] -- .pull-right[ ### What you get...  ] --- ## Inserting images from the web -- .pull-left[ ### What you type... ```  ``` ] -- .pull-right[ ### What you get...  ] --- ## Using blockquotes -- .pull-left[ <br><br> ### What you type... <br> ``` This is normal text > This is a block quote ``` ] -- .pull-right[ <br><br> ### What you get... This is normal text > This is a block quote ] --- ## Using nested lists -- .pull-left[ <br><br> ### What you type... <br> ``` 1. First item in list 2. Second item in list - first item in sub-list - second item in sub-list 3. Third item in list ``` ] -- .pull-right[ <br><br> ### What you get... <br> 1. First item in list 2. Second item in list - first item in sub-list - second item in sub-list 3. Third item in list ] --- class: middle, inverse background-image: url("img/silhouette.jpg") background-size: cover .pull-left-narrow[ .huge-bisque-number[6] ] .pull-right-wide[ <br><br><br> .larger[.embolden[R markdown]] ] --- class: middle ## What do we want? - Something that... lets you write text in **markdown** - Something that... lets you include **R code** (e.g. for data vis) - Something that... can **build** to HTML, PDF, Word, etc --- class: middle, inverse .hand[Demonstration:<br>Write an R markdown document] --- class: middle ## Let's dissect the document we just wrote! <img src="img/my_first_rmd_plain.png" width="60%" height="70%" /> --- ## The part inside ` --- ` is the "YAML header" <img src="img/my_first_rmd_yaml.png" width="60%" height="70%" /> --- class: middle <h2>The part inside <code>```{r}</code> is R code</h2> <img src="img/my_first_rmd_r.png" width="60%" height="70%" /> --- ## The rest is markdown <img src="img/my_first_rmd_markdown.png" width="60%" height="70%" /> --- class: middle, inverse background-image: url("img/silhouette.jpg") background-size: cover .pull-left-narrow[ .huge-bisque-number[7] ] .pull-right-wide[ <br><br><br> .larger[.embolden[Custom documents]] ] --- ## The YAML header is used for customisation <img src="img/my_first_rmd_yaml.png" width="60%" height="70%" /> --- class: middle ## Wait... what's the YAML acronym? - Originally: "Yet Another Markup Language" - Later: "YAML Ain't Markup Language" - ... it really doesn't matter 🙄 --- ## Output HTML only ``` --- title: "My First R Markdown Document" author: "Danielle J. Navarro" date: "10/02/2021" output: html_document --- ``` --- ## Output HTML and PDF ``` --- title: "My First R Markdown Document" author: "Danielle J. Navarro" date: "10/02/2021" output: pdf_document: default html_document: default --- ``` -- <br> - Notice the indentation - YAML is *very* picky about this --- class: middle, inverse .hand[Demonstration!] --- ## Themes for HTML documents ``` --- output: html_document: theme: readable --- ``` -- **Possible themes**: default, cerulean, journal, flatly, darkly, readable, spacelab, united, cosmo, lumen, paper, sandstone, simplex, yeti --- ## Table of contents ``` output: html_document: toc: true toc_float: true ``` --- class: middle, inverse .hand[Do it yourself!] - Practice editing the YAML header - Delete everything but the header and knit. What changed? - Try creating different outputs and themes - Try creating a floating table of contents - Try to get it to not float! --- class: middle, inverse background-image: url("img/silhouette.jpg") background-size: cover .pull-left-narrow[ .huge-bisque-number[8] ] .pull-right-wide[ <br><br><br> .larger[.embolden[Inserting equations]] ] --- ## An overview - Anything inside dollar signs `$` is treated as "inline" maths - Anything inside two dollar `$$` is a standalone equation - Whitespace matters: `$x$` is an equation, `$x $` is not - Equations follow "LaTeX" rules --- ## Equations are special .pull-left[ ``` This $x^2$ is inline This equation is standalone $$ a^2 + b^2 = c^2 $$ ``` ] -- .pull-right[This `\(x^2\)` is inline] --- # Hiding the Mess - Options for code chunks - At the start of your document in a code chunk or within each chunk `{r}` <img src="cleanup_code.jpeg" width="100%" /> --- # Exercise - Edit the code chunks that are contained within the default template - Add a fig caption # Visual Editor - One fairly new feature (and one reason we're using RStudio today!) is their new [visual markdown editor](https://rstudio.github.io/visual-markdown-editing/). It's basically an ultra powerful hybrid of Markdown and Microsoft Word. But be warned, it's a little buggy if you frequently switch editing modes. - People write whole books in Markdown, and this may make that seem a little more achievable. For example, the new visual editor allows [easy citation management with a Zotero library](https://www.rstudio.com/blog/rstudio-1-4-preview-citations/) (if we have time, I'll show you this on my computer). --- # Cheat Sheet - https://www.markdownguide.org/cheat-sheet/ --- # The Future - [Quarto](https://quarto.org/) is a sequel to RMarkdown developed by RStudio. - While they are still maintaining RMarkdown, a lot of new development will probably happen in Quarto. - The differences between RMarkdown and Quarto are not huge for R users ([overview here](https://yihui.org/en/2022/04/quarto-r-markdown/)), and there is much more RMarkdown documentation available, which is why I taught it today. I encourage you to keep tabs on Quarto's development and try it out, especially if you're not an R user. --- class: middle, inverse # Papaja .pull_right[ <img src="papaja_hex.png" width="50%" height="50%" /> ] --- # Installing Papaja -- ```r # Install latest CRAN release #install.packages("papaja") # Install remotes package if necessary #if(!requireNamespace("remotes", quietly = TRUE)) install.packages("remotes") # Install the stable development version from GitHub #remotes::install_github("crsh/papaja") # Install the latest development snapshot from GitHub #remotes::install_github("crsh/papaja@devel") ``` --- # Open Papaja <img src="open_papaja.png" width="100%" />